Cart Summary
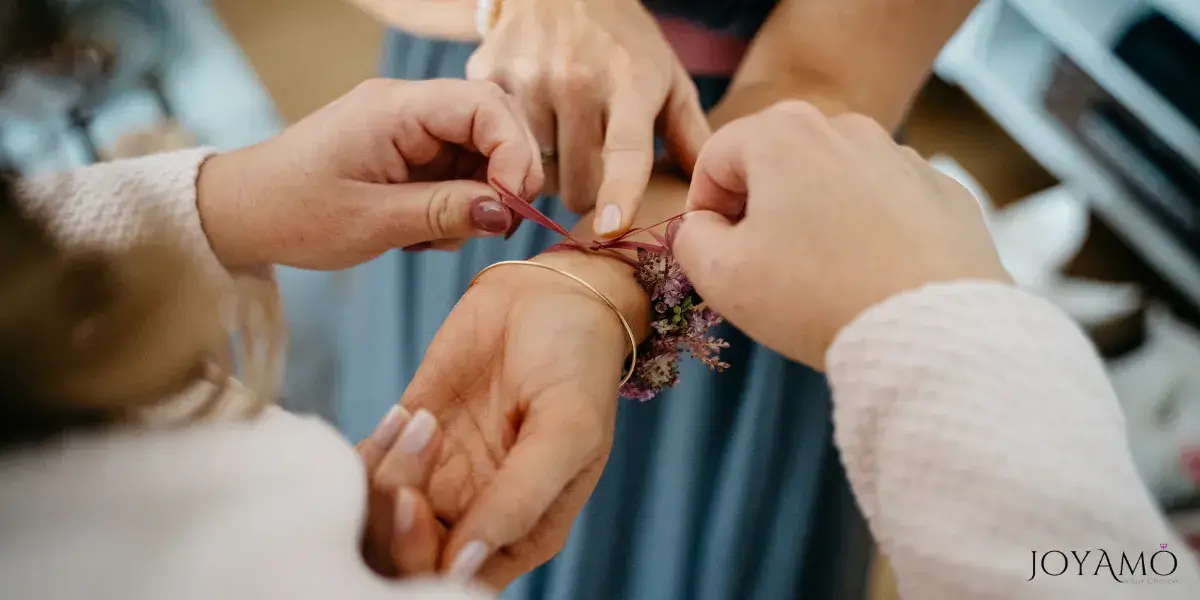
Friendship bracelets are more than just accessories; they symbolize the bonds of friendship and the ties that connect us.
Originating from indigenous cultures, these handmade tokens of affection have evolved into a cherished tradition shared among friends worldwide.
Typically crafted from colorful threads or yarns, friendship bracelets are intricately woven or knotted into patterns using different techniques.
Beyond their aesthetic appeal, friendship bracelets hold deep sentimental value.
They are tangible reminders of the special bonds we share with our friends, representing loyalty, support, and lasting camaraderie.
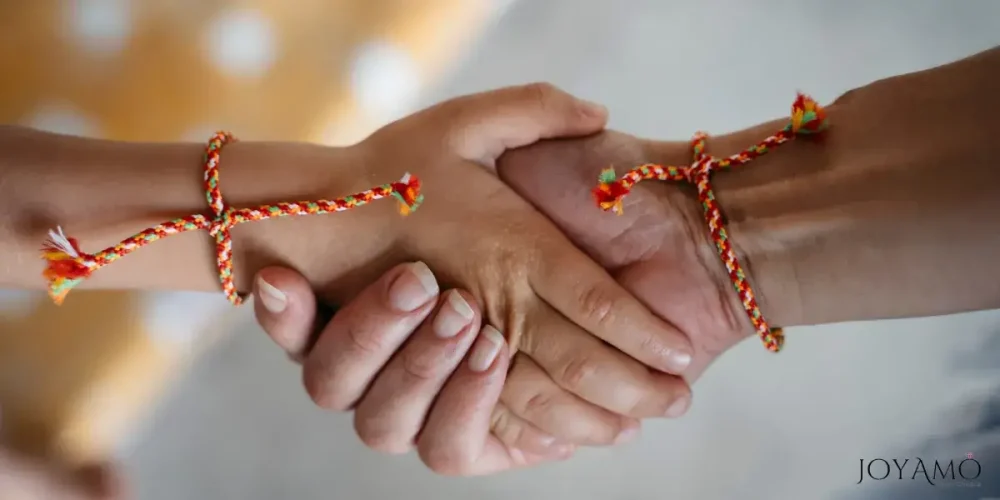
Exchanged during childhood summers at camp or as heartfelt gifts among lifelong pals, friendship bracelets encapsulate the spirit of friendship in a simple yet meaningful way.
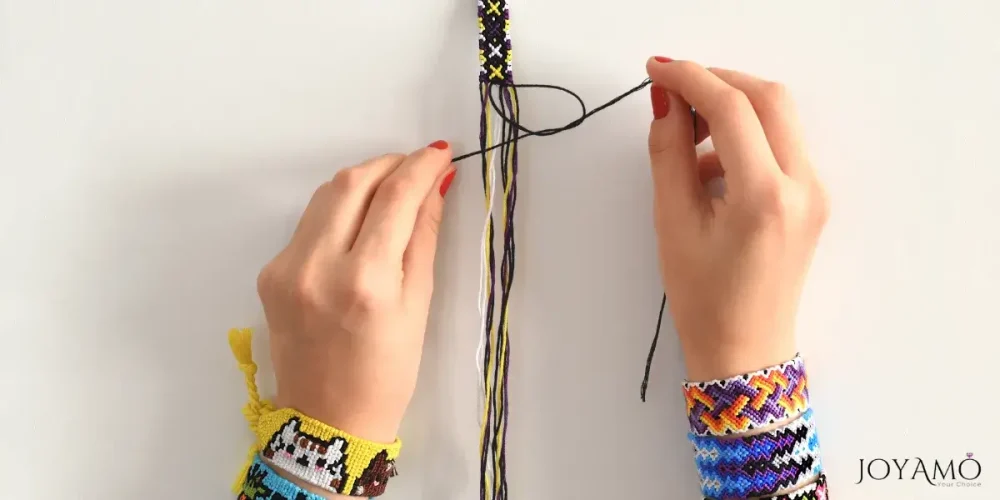
Moreover, the process of creating friendship bracelets fosters creativity, patience, and a sense of camaraderie.
From selecting vibrant threads to mastering intricate knotting techniques, crafting these bracelets is a labor of love that strengthens the bonds between friends.
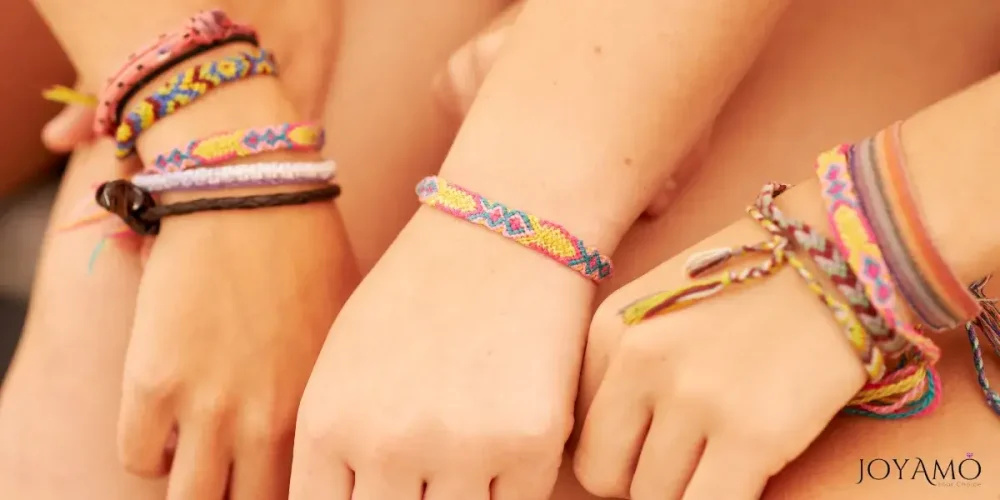
Worn as matching sets or as individual expressions of affection, friendship bracelets continue to serve as timeless symbols of friendship, uniting friends across distances and generations.
How to Make Friendship Bracelets
Friendship bracelets are charming accessories and heartfelt tokens of affection exchanged between friends.
With their vibrant colors and intricate patterns, these bracelets are symbols of camaraderie and lasting friendship.
Creating your friendship bracelets allows you to personalize each piece and infuse it with the love and care you share with your friends.
Here’s a step-by-step guide on how to make friendship bracelets, along with different techniques and materials to get you started:
Materials Needed:
- Embroidery floss or yarn in various colors
- Scissors
- Tape or safety pins to secure your work
Techniques:
- Basic Knotting Technique:
- Cut several strands of embroidery floss, each about 24 inches long.
- Gather the strands together and tie a knot at one end, leaving a small loop for attaching the bracelet.
- Divide the strands into pairs, and begin knotting them using a simple knotting technique called the forward knot or the backward knot.
- Continue knotting until you reach the desired length, then tie a knot at the other end to secure the bracelet.
- Braiding Technique:
- Cut three strands of embroidery floss, each about 24 inches long.
- Tie a knot at one end to secure the strands together.
- Begin braiding the strands together, crossing the outer strands over the middle one.
- Continue braiding until you reach the desired length, then tie a knot at the other end to secure the bracelet.
- Macramé Technique:
- Cut several strands of embroidery floss, each about 24 inches long.
- Fold each strand in half and attach them to a key ring or safety pin.
- Using square knots or other macramé knots, create intricate patterns by alternating the strands.
- Continue knotting until you reach the desired length, then tie a knot at the end to secure the bracelet.
Step-by-Step Instructions:
- Choose Your Colors:
- Select the colors of embroidery floss you want to use for your bracelet. You can choose your friend’s favorite colors or create a rainbow of hues.
- Prepare Your Workspace:
- Find a comfortable and well-lit area to work in, and gather all your materials.
- Cut Your Strands:
- Depending on the technique you’re using, cut several strands of embroidery floss to the desired length.
- Secure Your Work:
- Use tape or safety pins to secure your work to a flat surface, such as a table or clipboard.
- Start Knotting:
- Begin knotting or braiding your strands together, following the chosen technique.
- Create Your Pattern:
- Experiment with different colors and patterns to create unique designs for your friendship bracelets.
- Finish Your Bracelet:
- Once you’ve reached the desired length, tie a knot at the end to secure the bracelet.
- Trim any excess floss, and carefully remove any tape or safety pins.
- Gift and Share:
- Give your handmade friendship bracelets to your friends as a token of your appreciation and affection.
- Wear your matching bracelets proudly as a symbol of your friendship and bond.
Follow these simple steps and experiment with different techniques and patterns so you can create beautiful matching bracelets that celebrate the special connections you share with your friends.
Gather your materials, unleash your creativity, and start crafting your unique tokens of friendship today!
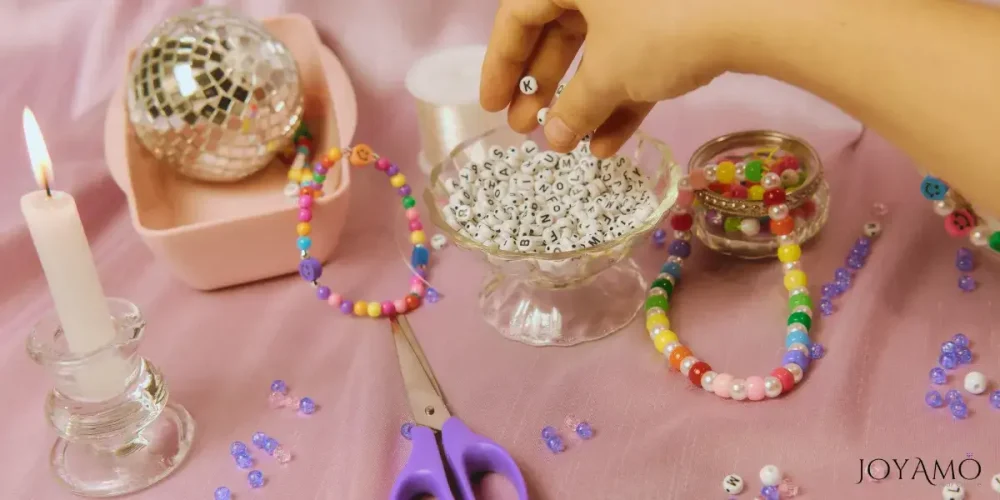
How to Tie Friendship Bracelets with Beads
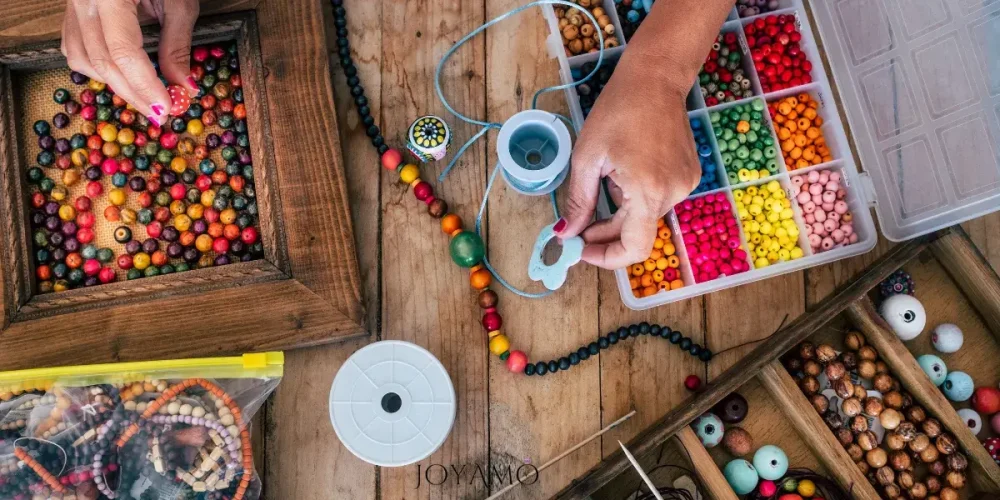
Friendship bracelets adorned with beads add an extra touch of charm and glam to these adorable symbols of affection.
If you add beads to your bracelet designs, you will have endless creativity and personalization, making each piece truly unique.
Here’s a step-by-step guide on how to tie friendship bracelets with beads, along with different techniques and materials to get you started:
Materials Needed:
- Embroidery floss or nylon cord in various colors
- Beads of your choice
- Scissors
- Tape or safety pins to secure your work
- Beading needle (optional)
Techniques:
- Basic Knotting Technique with Beads:
- Cut several strands of embroidery floss or nylon cord, each about 24 inches long.
- Thread a bead onto one of the strands, and slide it down to the center.
- Tie a knot on either side of the bead to secure it in place.
- Continue knotting the strands using a basic knotting technique, incorporating beads into the design as desired.
- Braiding Technique with Beads:
- Cut three strands of embroidery floss or nylon cord, each about 24 inches long.
- Thread beads onto each strand, spacing them evenly along the length.
- Begin braiding the strands together, making sure to incorporate the beads into the braid.
- Continue braiding until you reach the desired length, then tie a knot at the end to secure the bracelet.
- Macramé Technique with Beads:
- Cut several strands of embroidery floss or nylon cord, each about 24 inches long.
- Thread beads onto each strand, alternating colors and sizes, to create a unique pattern.
- Use square knots or other macramé knots to create intricate designs, incorporating beads into the knots as desired.
- Continue knotting until you reach the desired length, then tie a knot at the end to secure the bracelet.
Step-by-Step Instructions:
- Choose Your Beads:
- Select beads of various colors, shapes, and sizes to create a visually appealing design for your friendship bracelet.
- Prepare Your Workspace:
- Find a comfortable and well-lit area to work in, and gather all your materials.
- Cut Your Strands:
- Depending on the technique you’re using, cut several strands of embroidery floss or nylon cord to the desired length.
- Thread Your Beads:
- Thread beads onto each strand of floss or cord, spacing them evenly along the length.
- Secure Your Work:
- Use tape or safety pins to secure your work to a flat surface, such as a table or clipboard.
- Start Tying:
- Begin tying your friendship bracelet using the chosen technique, incorporating beads into the design as you go.
- Create Your Pattern:
- Experiment with different bead arrangements and patterns to create a unique design for your bracelet.
- Finish Your Bracelet:
- Once you’ve reached the desired length, tie a knot at the end to secure the bracelet.
- Trim any excess floss or cord, and carefully remove any tape or safety pins.
- Gift and Share:
- Give your handmade friendship bracelets with beads to your friends as a special token of your appreciation and affection.
- Wear your matching bracelets proudly as a symbol of your friendship and bond.
Follow these simple steps and experiment with different techniques and bead arrangements. You will be able to create beautiful friendship bracelets adorned with beads and, at the same time, celebrate the special bond you share with your friends.
So gather your materials, unleash your creativity, and start crafting your unique tokens of friendship today!
Taylor Swift Friendship Bracelets
The Eras Tour Connection
Taylor Swift, the renowned singer-songwriter, is known all over the world for her chart-topping hits and also for her close friendships with fellow artists and celebrities.
Over the years, Taylor Swift has celebrated the power of friendship through her music and personal life, often seen exchanging handmade friendship bracelets with her closest besties.
These bracelets serve as infinite symbols of the strong bonds she shares with her friends, and fans have been inspired to create their own Taylor Swift-inspired friendship bracelets.
Here’s a step-by-step tutorial on how to make Taylor Swift’s iconic friendship bracelets, along with some nods to her Eras Tours:
Materials Needed:
- Embroidery floss or yarn in various colors (preferably shades reminiscent of Taylor’s album eras)
- Scissors
- Tape or safety pins to secure your work
- Beads or charms (optional)
Tutorial:
- Choose Your Colors:
- Taylor Swift’s music is often associated with different eras, each characterized by a unique color palette. Choose embroidery floss or yarn in colors that represent Taylor’s various eras, such as pastel shades for the “Lover” era or bold hues for the “Reputation” era.
- Prepare Your Workspace:
- Find a comfortable and well-lit area to work in, and gather all your materials.
- Cut Your Strands:
- Cut several strands of embroidery floss or yarn, each about 24 inches long. You can choose to use multiple colors for a more intricate design.
- Secure Your Work:
- Use tape or safety pins to secure your work to a flat surface, such as a table or clipboard.
- Start Braiding:
- Divide your strands into three equal sections and begin braiding them together using a basic braiding technique.
- Incorporate Charms (Optional):
- If desired, you can thread beads or charms onto one of the strands before braiding to add a personal touch to your bracelet. Choose charms that reflect Taylor Swift’s interests or iconic symbols from her music.
- Create a Pattern:
- Experiment with different color combinations and patterns to create a design that reflects Taylor Swift’s style and personality. You can incorporate stripes and chevrons, or even spell out lyrics from her songs using different colored threads.
- Tie a Knot:
- Once you’ve reached the desired length, tie a knot at the end of your braid to secure the bracelet. Leave some extra length at the end for tying the bracelet around your wrist.
- Gift and Share:
- Share your Taylor Swift-inspired friendship bracelets with your friends as a symbol of your admiration for Taylor’s music and your appreciation for your friendship.
- Wear your matching bracelets proudly as you embark on your own “Eras Tour” of friendship, celebrating the special connections you share with your friends.
With these simple steps and your creativity in design, you can create beautiful Taylor Swift-inspired friendship bracelets that pay homage to the singer’s iconic music and strong friendships.
Let your imagination run wild as you design these bracelets that are reminders of the power of friendship and the joy of creating something meaningful together.
Friendship Bracelet Patterns and Techniques
Friendship bracelets hold a place in our hearts as symbols of companionship and love, treasured keepsakes traded among pals to honor their connections.
These handcrafted adornments, with their hues and detailed patterns, embody the essence of friendship and imagination.
If you’re new to crafting or a seasoned bracelet artisan, open up to a new world of opportunities for crafting presents and souvenirs.
In this blog, we’ll develop three methods for making friendship bracelets: the Knotting Technique, the Chevron Technique, and the Braiding Technique.
Each method brings allure and adaptability, enabling you to explore designs and styles that resonate with your preferences and artistic flair.
1. Knotting Technique
The Knotting Technique is one of the most common and versatile methods for tying friendship bracelets. It involves using simple knots to create intricate patterns and designs.
Here’s a step-by-step tutorial on how to tie a friendship bracelet using the Knotting Technique:
Materials Needed:
- Embroidery floss or yarn in various colors
- Scissors
- Tape or safety pins to secure your work
Tutorial:
- Choose Your Colors:
- Select the colors of embroidery floss you want to use for your bracelet. You can choose a single color for a classic look or mix and match different colors for a more vibrant design.
- Cut Your Strands:
- Cut several strands of embroidery floss, each about 24 inches long. You’ll need two strands of each color for a basic bracelet.
- Secure Your Work:
- Use tape or safety pins to secure your work to a flat surface, such as a table or clipboard.
- Start Knotting:
- Take one pair of strands and tie a knot at one end, leaving a small loop for attaching the bracelet.
- Divide the strands into pairs and begin knotting them using a simple knotting technique called the forward knot or the backward knot.
- Continue knotting until you reach the desired length, then tie a knot at the other end to secure the bracelet.
- Experiment with Patterns:
- Once you’ve mastered the basic knotting technique, experiment with different patterns and designs by varying the colors and sequences of your knots.
- You can create diagonal stripes, chevrons, and diamonds, or even spell out words using different colored threads.
- Finish Your Bracelet:
- Once you’re happy with the length and design of your bracelet, tie a knot at each end to secure the strands.
- Trim any excess floss, and carefully remove any tape or safety pins.
- Gift and Share:
- Give your handmade friendship bracelet to your friend as a special token of your affection and appreciation.
- Wear your matching bracelets proudly as symbols of your friendship and bond.
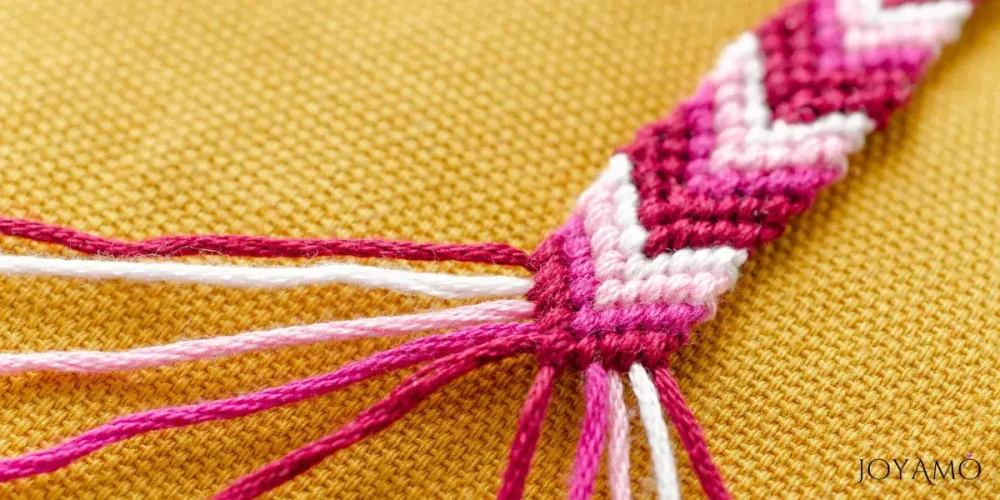
2. Chevron Technique
The Chevron Technique is a classic method for creating zigzag patterns in friendship bracelets.
It involves using a series of forward knots and backward knots to create diagonal stripes.
Here’s a tutorial on how to tie a friendship bracelet using the Chevron Technique:
Materials Needed:
- Embroidery floss or yarn in various colors
- Scissors
- Tape or safety pins to secure your work
Tutorial:
- Choose Your Colors:
- Select two or more colors of embroidery floss for your bracelet. You can choose complementary colors for a classic look or mix and match different hues for a more eclectic design.
- Cut Your Strands:
- Cut several strands of embroidery floss, each about 24 inches long. You’ll need two strands of each color for a basic bracelet.
- Secure Your Work:
- Use tape or safety pins to secure your work to a flat surface, such as a table or clipboard.
- Start Braiding:
- Take one pair of strands and tie a knot at one end, leaving a small loop for attaching the bracelet.
- Divide the strands into pairs, and begin braiding them together using a basic braiding technique.
- Continue braiding until you reach the desired length, then tie a knot at the other end to secure the bracelet.
- Experiment with Patterns:
- Once you’ve mastered the basic braiding technique, experiment with different patterns and designs by varying the colors and sequences of your braids.
- You can create zigzag stripes, diagonal chevrons, or even intricate diamond patterns using different colored threads.
- Finish Your Bracelet:
- Once you’re happy with the length and design of your bracelet, tie a knot at each end to secure the strands.
- Trim any excess floss, and carefully remove any tape or safety pins.
- Gift and Share:
- Give your handmade friendship bracelet to your friend as a special token of your affection and appreciation.
- Wear your matching bracelets proudly as symbols of your friendship and bond.
3. Braiding Technique
The Braiding Technique is a classic method for creating simple yet elegant friendship bracelets.
It involves weaving strands of embroidery floss or yarn together to create intricate patterns and designs.
Here’s a tutorial on how to tie a friendship bracelet using the Braiding Technique:
Materials Needed:
- Embroidery floss or yarn in various colors
- Scissors
- Tape or safety pins to secure your work
Tutorial:
- Choose Your Colors:
- Select two or more colors of embroidery floss for your bracelet. You can choose complementary colors for a classic look or mix and match different hues for a more eclectic design.
- Cut Your Strands:
- Cut several strands of embroidery floss, each about 24 inches long. You’ll need two strands of each color for a basic bracelet.
- Secure Your Work:
- Use tape or safety pins to secure your work to a flat surface, such as a table or clipboard.
- Start Braiding:
- Take one pair of strands and tie a knot at one end, leaving a small loop for attaching the bracelet.
- Divide the strands into pairs, and begin braiding them together using a basic braiding technique.
- Continue braiding until you reach the desired length, then tie a knot at the other end to secure the bracelet.
- Experiment with Patterns:
- Once you’ve mastered the basic braiding technique, experiment with different patterns and designs by varying the colors and sequences of your braids.
- You can create spiral braids, fishtail braids, or even intricate Celtic knot patterns using different colored threads.
- Finish Your Bracelet:
- Once you’re happy with the length and design of your bracelet, tie a knot at each end to secure the strands.
- Trim any excess floss, and carefully remove any tape or safety pins.
- Gift and Share:
- Give your handmade friendship bracelet to your friend as a special token of your affection and appreciation.
- Wear your matching bracelets proudly as symbols of your friendship and bond.
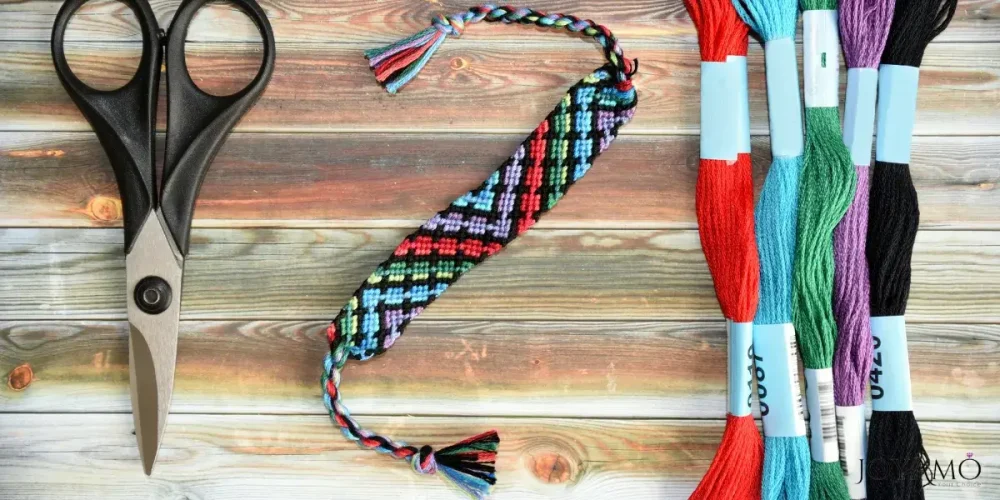
If you master these three techniques for tying friendship bracelets, you’ll be able to create beautiful and meaningful accessories that celebrate the bonds of friendship and the joy of crafting together.
Gather your materials now, unleash your creative side, and start tying friendship bracelets today!
💡How to make friendship bracelets with beads FAQ
✔ How do you make a bracelet with beads for beginners?
Making a bracelet with beads for beginners is relatively simple. Start by selecting your desired beads and stringing them onto a stretchy or flexible cord, such as an elastic or nylon thread. Add clasps or closures at each end to secure the bracelet. You can use beading wire and crimp beads for a more structured design. Experiment with different bead arrangements and patterns to create your desired look, and don’t forget to measure your wrist size to ensure a comfortable fit.
✔ How do you make friendship bracelets with string and beads?
Friendship bracelets made with string and beads offer endless possibilities for creativity and personalization. Begin by choosing your preferred string material, such as embroidery floss or nylon cord, and select beads in various colors and sizes. Use basic knotting techniques, such as the forward knot or backward knot, to weave the beads into your bracelet design. Incorporate different bead patterns or symbols to customize the bracelet for your friend, adding a personal touch to your handmade gift.
✔ How long should I make a beaded friendship bracelet?
The length of a beaded friendship bracelet largely depends on personal preference and the desired style of the bracelet. As a general guideline, measure the recipient’s wrist circumference and add a few extra inches for ease of wear and to accommodate the closure mechanism, whether it’s a clasp, knot, or adjustable closure. Keep in mind that adjustable closures, such as sliding knots or adjustable clasps, offer flexibility in sizing and can fit a range of wrist sizes comfortably.
✔ What is the easiest type of friendship bracelet to make?
Creating a friendship bracelet is usually done through a braiding or knotting method. These bracelets don’t need a lot of materials or complicated techniques, which makes them perfect for beginners or anyone wanting a fun and simple project. You can try out styles like a three-strand braid or a sequence of square knots and enhance them with beads or charms for added style. If you practice and let your creativity flow, you’ll be able to craft friendship bracelets to give to those you love.